Replace Overhead Console - 2001 Chevy Venture
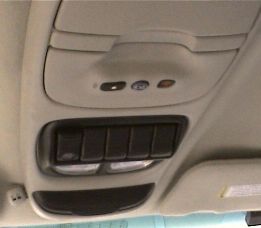
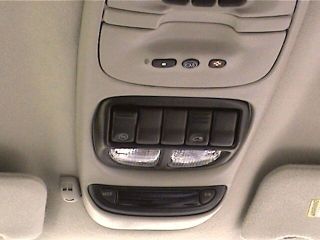
I replaced the Overhead Console after reading a post in the automotive forums that someone had "upgraded" their Venture from the stock console to one that included the Driver Information Center (DIC).  This is a "trip computer" that shows various displays like: Average Gas Mileage, Instantaneous Gas Mileage, Range (how far you can drive with the remaining fuel), Fuel Used and Average Speed.  All of these are since the last reset, except Range & Instantaneous Mileage.

The other cool feature of the Driver Information Center is that it has an Electronic Compass and an Outside Temperature Display.  To make the temperature display work, I had to buy and install the Outside Temperature Sensor, but that is another story.  Click the link if you want to read about that.

The replacement Overhead Console was found on eBay for about $45 ($25 + $20 shipping/Handling).  According to the listing on eBay, the 'new' console was from a 2003 Venture.  This was lucky because I have discovered some minor difference between the DIC connector pinouts between starting with the 2000 model year.
 
Here are some details and pictures from my 2001 Venture that show how this was done. 

Here is the Original Overhead Console. Notice that:

1 - Front section is a simple storage compartment
2 - Only one switch (inside lighting override - on left)
3 - Back section is storage for a garage door opener.

Original Overhead Console

The first step was to remove the screws that hold the console to the roof.  The front screw is obvious, but the others are hidden in the back two compartments (see pictures below). 

Overhead Console Screws - Middle

Overhead Console Screws - Back

The next step was to get the wiring connected to the console. The good news was that the wiring & connectors for everything was already there.  The bad news was it was taped down to the headliner on the driver's side. 

Overhead Console Wiring 1

I had to remove the sunshade clips to lower the front of the headliner and reach between the roof & headliner to get the Driver Information Center connector loose.  Once that was done, connecting everything was fairly easy. 

Overhead Console Wiring - Left

The only exception was the connection for the On-Star microphone.  That was a real pain because of limited space.  If I was to do it again, I would kept the original microphone (and saved about 45 minutes of the 2 hour swap time).

Overhead Console Wiring - Right

Here is the Replacement Overhead Console. Notice that:

1 - Front section is now the Driver Information Center
2 - Switch for Rear Quarter Windows included (future plans)
3 - Back section is now the "Home-link" system (programmable to open garage door, open gates, etc.).

New Overhead Console

Note: Everything (except Home-link) was tested and works.  The On-Star microphone was not as good as the original, so I put the original back in. I am planning on getting the actuators (motors) for the rear quarter windows as soon as I can find them at a reasonable price (the dealer wants about $80 each - too much).

Van Home | Maintenance Index | Other Information