Upgrade Body Control Module on My Chevy Venture |
I replaced/upgraded the Body Control Module (BCM) in my Chevy Venture after reading some information in my Owner's Manual about the ability to program the "Lock/Unlock Confirmation" if you have the right components installed in the van. The key component was the BCM itself, but there is a little more to it. I have done a couple of other "upgrades" to the van, like upgrading the Overhead Console & installing the Ambient Temperature Sensor, so this didn't seem to be a very big deal. The fact that I know a little bit about electronics and controllers doesn't hurt either ;).
Some background
information: While researching this project (using the factory service manual), I discovered that the "option" for these cool features has a name (number really). It is called "RPO UA6" and includes the following elements:
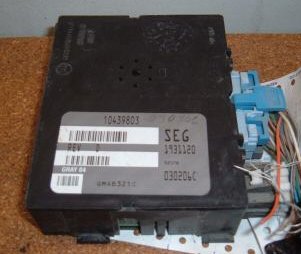
Since I didn't have any of these parts, I did a search on eBay for the Version 4 of the BCM (GM Part #10439803. BCM-3 is #10427831). I found a "Buy-it-Now" BCM for about $33.00, including shipping & handling. This was the only "active" component of the upgrade, but I had more work to do.
Research &
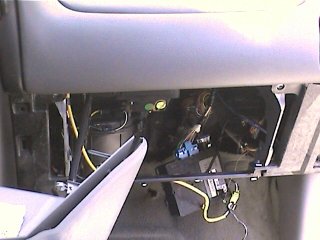
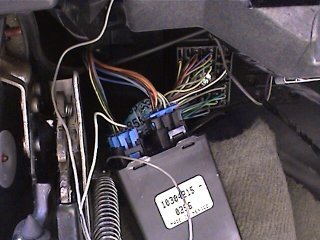
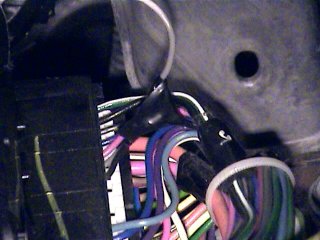
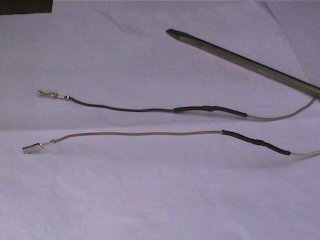
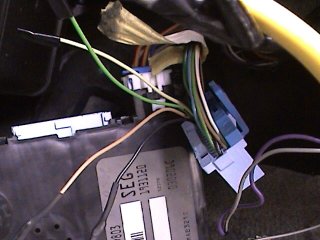
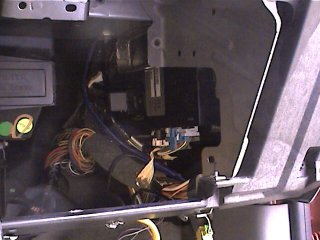
Construction: The hardest part of building these cables was the fact that the van is "too new" to be able to find replacement parts at the local salvage yards. My plan was to find the same type connector as the DRL module and remove a couple of pins that could be inserted into the current connector. After visiting a few yards with no joy, I decided to go to my trusted parts house and see what they could do for me. After about 30-40 minutes, my "expert" at the part house found what looked to be the correct connector pin that would do the job (Thanks Jim!). I did not have to worry about the BCM pins because the replacement came with its connectors still attached and the wires cut to about 4 inches. Making the cables was not that hard. For the signal that makes the lights flash, I simply attached the new pin to the end of some wiring I had, so that I could insert it into the DRL connector in the right spot. For the signal that beeps the horn, I found the wire at the bottom of the steering column and spliced into it with another wire. That took care of the driver's side of the wiring. For the BCM, I removed some pins that came with the new BCM connector and soldered them to the other end of the new cable. To keep it "easy", I tucked the new cable under the edge of the carpeting near the floorboard. The next challenge was getting the new pin into the old DRL connector. It probably would have been easier if I had everything on a bench and plenty of space to work, but I was working in the tight space below the steering column. After what seemed like hours (probably about 30 minutes really), I was able to get the new pin into the connector. Getting the pins into the BCM connector was a breeze, by comparison. Once all the pins were in the correct connectors, I plugged everything back in and gave it a test. Success! All that was left to do was to clean up my mess and program the system to behave the way I wanted it to. The mode I picked (mode 4) was to have the lights flash any time the lock or unlock button is pushed on the remote, and the horn to beep when the lock button is pushed a second time within 5 seconds. As a bonus, I noticed that the "Panic" button on the remotes I got from eBay now work! Push it once and the lights flash while the horn beeps like crazy. Push the button again and it stops. Another interesting thing is that the "Trunk Release" button on the remote caused the lights to flash! (the eBay remotes were not an exact match to the van). Here are some pictures I took while doing the job. |
|||||||
|